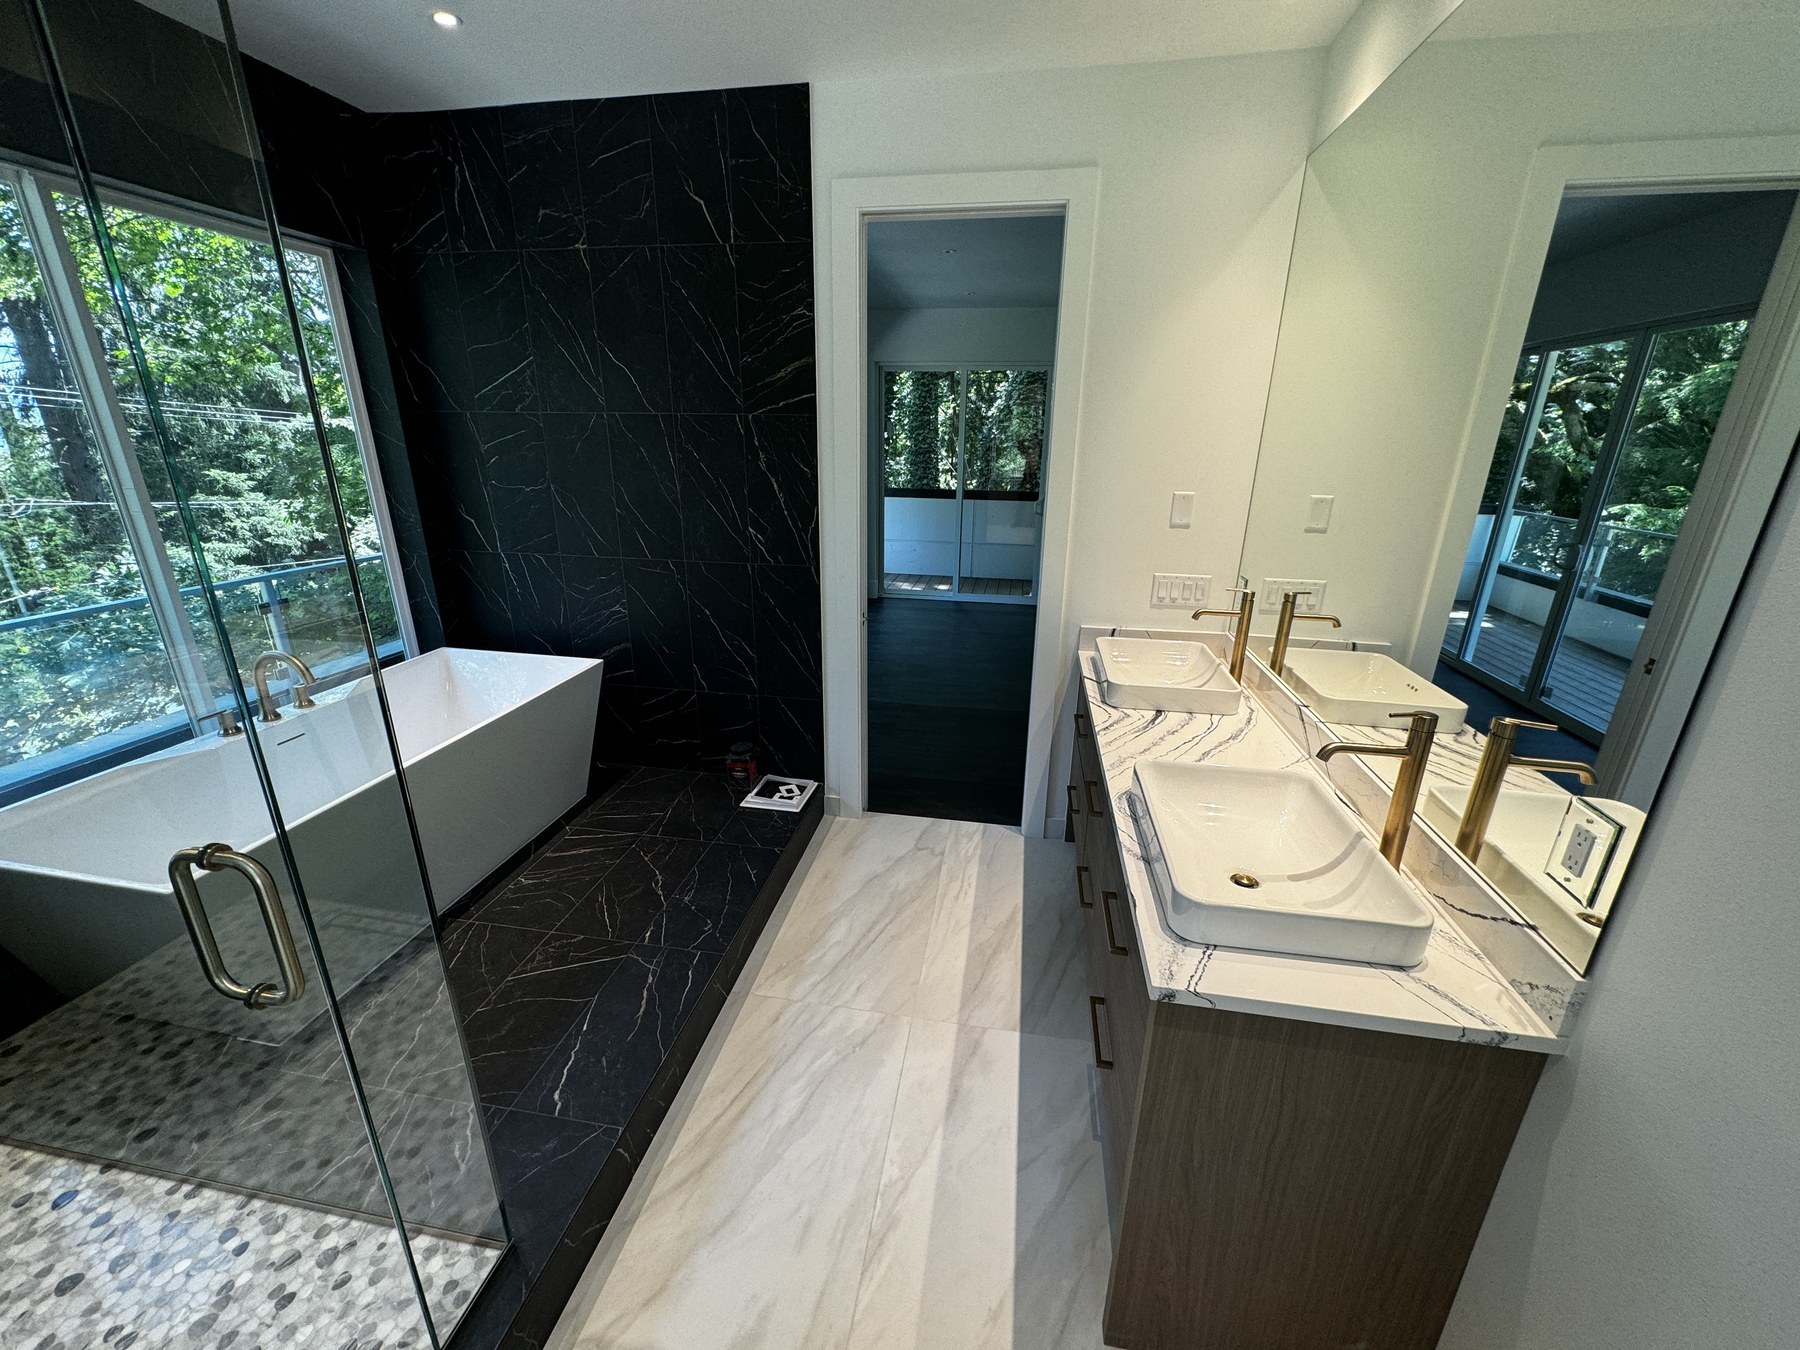
Full LeviArs bathroom with a glass shower, freestanding tub, double vanity, dark veined wall tile and pale tiled floor

Showers · Floors · Backsplashes · Fireplace surrounds

Tile Installation in Kirkland, Bellevue & Seattle

Precision in every line and transition.

Thoughtful materials. Carefully planned patterns. Tile that connects your room, from the first selection to the finished edge.

LeviArs project collection · shower, tub, double vanity and tiled floor

Service at a glance

Tile installation by LeviArs

LeviArs plans and builds tile installation projects for homeowners across King and Snohomish Counties. Design, selections and construction are coordinated through our Kirkland Design Center.

Primary scope
Showers and bathroom tile, Kitchen backsplashes, Fireplace surrounds and feature walls
Service area
King County and Snohomish County, Washington
Project delivery
One coordinated design-and-build process
First step
Consultation, site review and project priorities

A finish for the way you live

Start with the room.
Bring the details together.

Bring your kitchen, bathroom or living space together with professional tile installation from LeviArs Design & Remodeling. From porcelain tile floors and ceramic backsplashes to natural stone showers and large-format feature walls, we help you compare materials and plan an installation for your space, style and everyday use.

Visit our Kirkland Design Center to coordinate tile, grout, trim and surrounding finishes. We serve homeowners throughout King and Snohomish Counties, with tile installation available as a standalone project or as part of kitchen remodeling, bathroom remodeling and whole-home renovation.

Materials, dimensions and specialty installations are reviewed for the actual project. The examples below are a selection guide—not a promise of current inventory or suitability for every location.

Where we install

Tile Installation for Every Room

01

Kitchen Backsplashes & Walls

Create a finished kitchen with tile selected to complement your cabinets and countertops. We plan backsplash height, outlet cuts, inside corners and exposed edges so subway tile, mosaics and larger wall tiles fit the space cleanly.

Explore kitchen remodeling
02

Bathroom Floors, Showers & Tub Surrounds

Coordinate bathroom floor tile, shower walls, shower pans, niches and tub surrounds. Wet-area installation includes planning the waterproofing system and drainage beneath the tile, with finishes selected for their intended use.

Explore bathroom remodeling
03

Entryways, Laundry Rooms & Living Spaces

Connect busy areas of your home with a coordinated tile finish. We review floor condition, traffic, cleaning needs and transitions to hardwood, carpet or other surfaces when planning the installation.

Compare flooring options
04

Fireplace Surrounds & Feature Walls

Add texture or a focal point with porcelain, ceramic or stone tile. Fireplace tile, backing and setting materials must suit the appliance requirements, temperature exposure and required clearances.

Explore fireplace remodeling
05

Commercial Interiors

For offices, retail spaces and other commercial interiors, tile selection considers expected traffic, maintenance and the project specification. Installation planning also addresses access and transitions between occupied areas.

Selected completed projects

Different rooms. Different tile directions.

Real photographs from our project collection show a kitchen backsplash, a tiled shower and a fireplace surround. Each is a separate project.

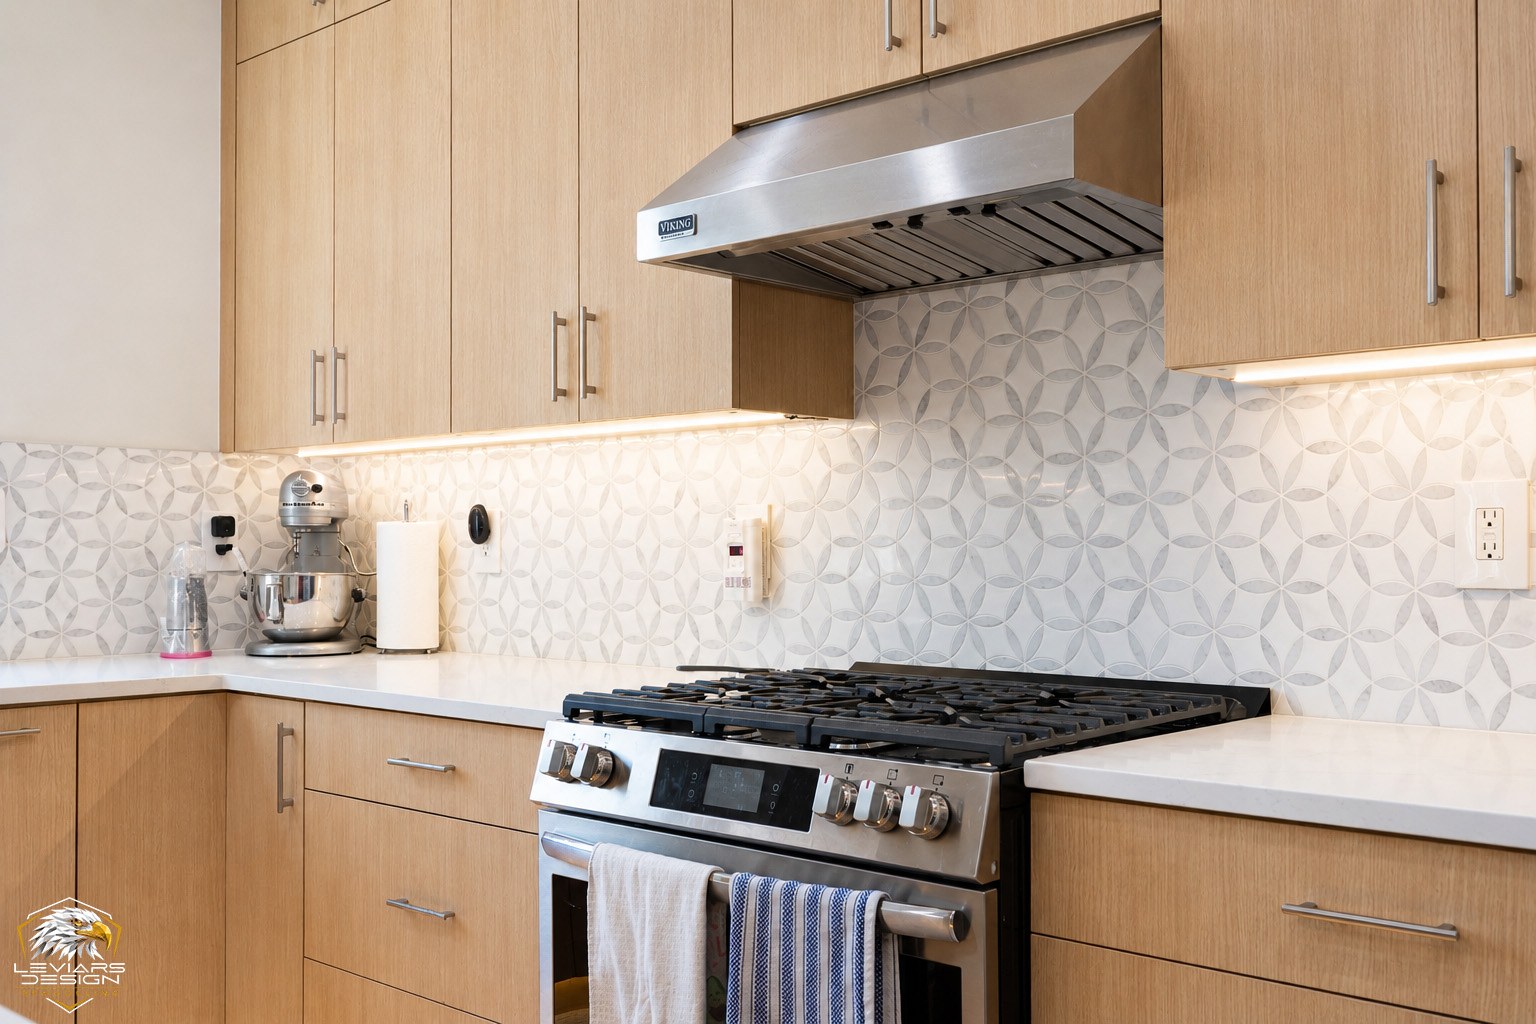
Geometric patterned tile backsplash around a kitchen range beneath light wood cabinets

A pattern that connects the kitchen

A light geometric backsplash continues around the range and beneath the cabinets in this completed kitchen.

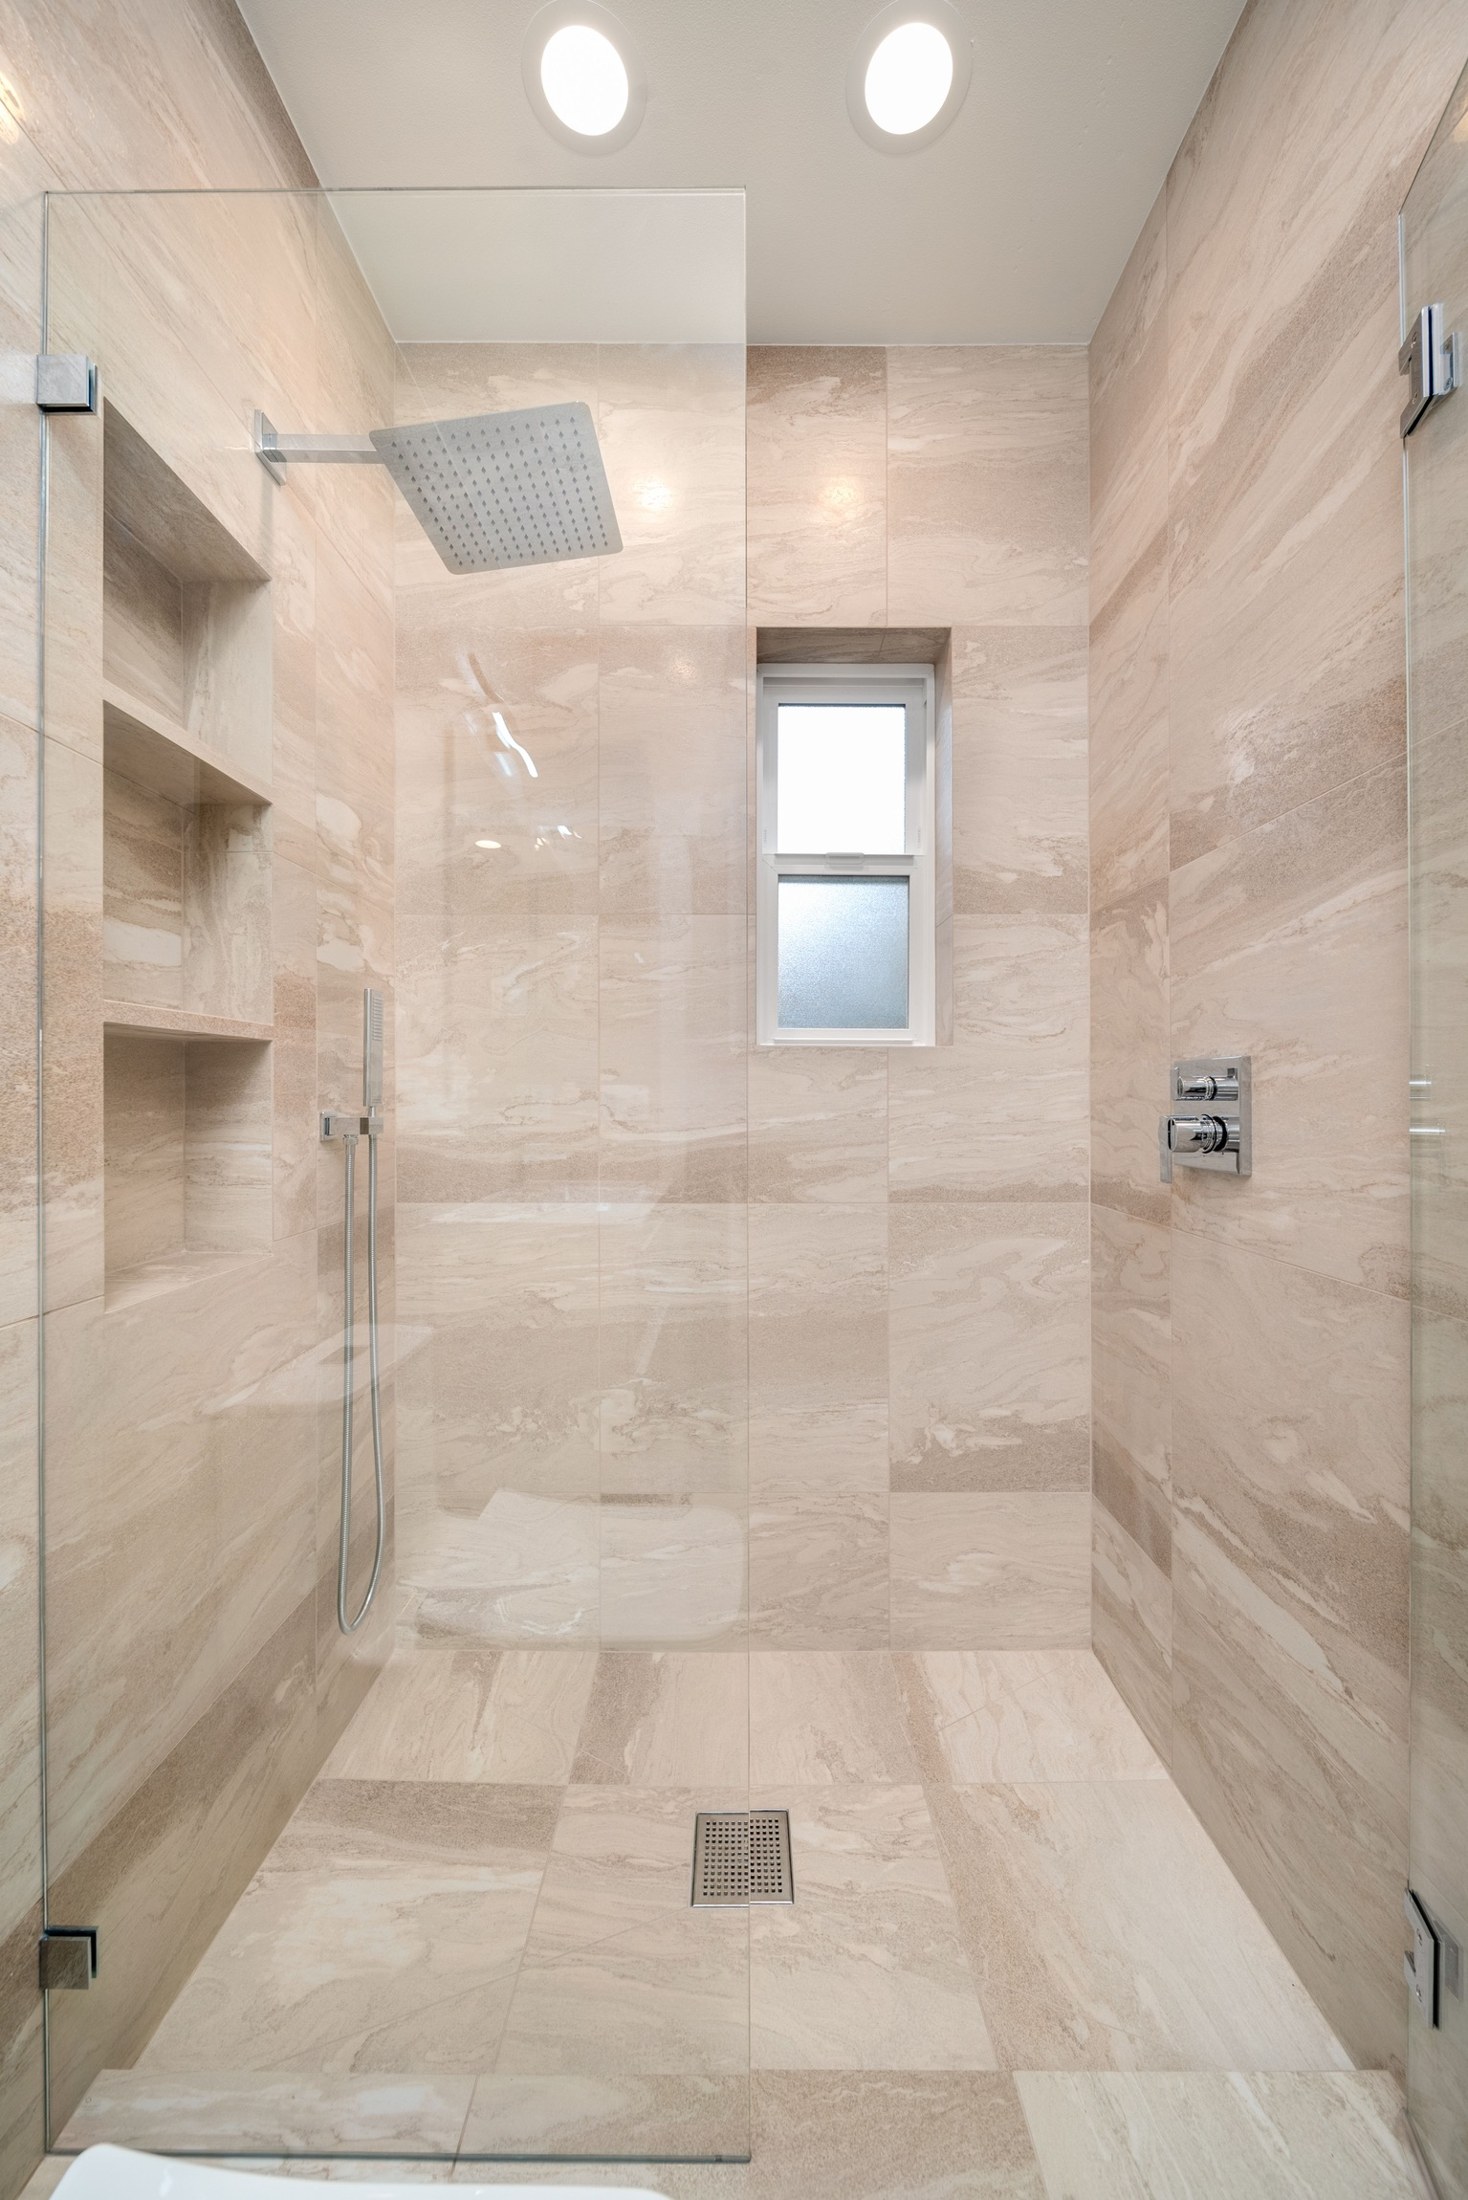
Completed shower with warm veined tile, three recessed niches, glass enclosure and a square floor drain

Tile across walls, niches and floor

Warm veining carries through the shower walls and floor, with recessed niches set into the side wall.

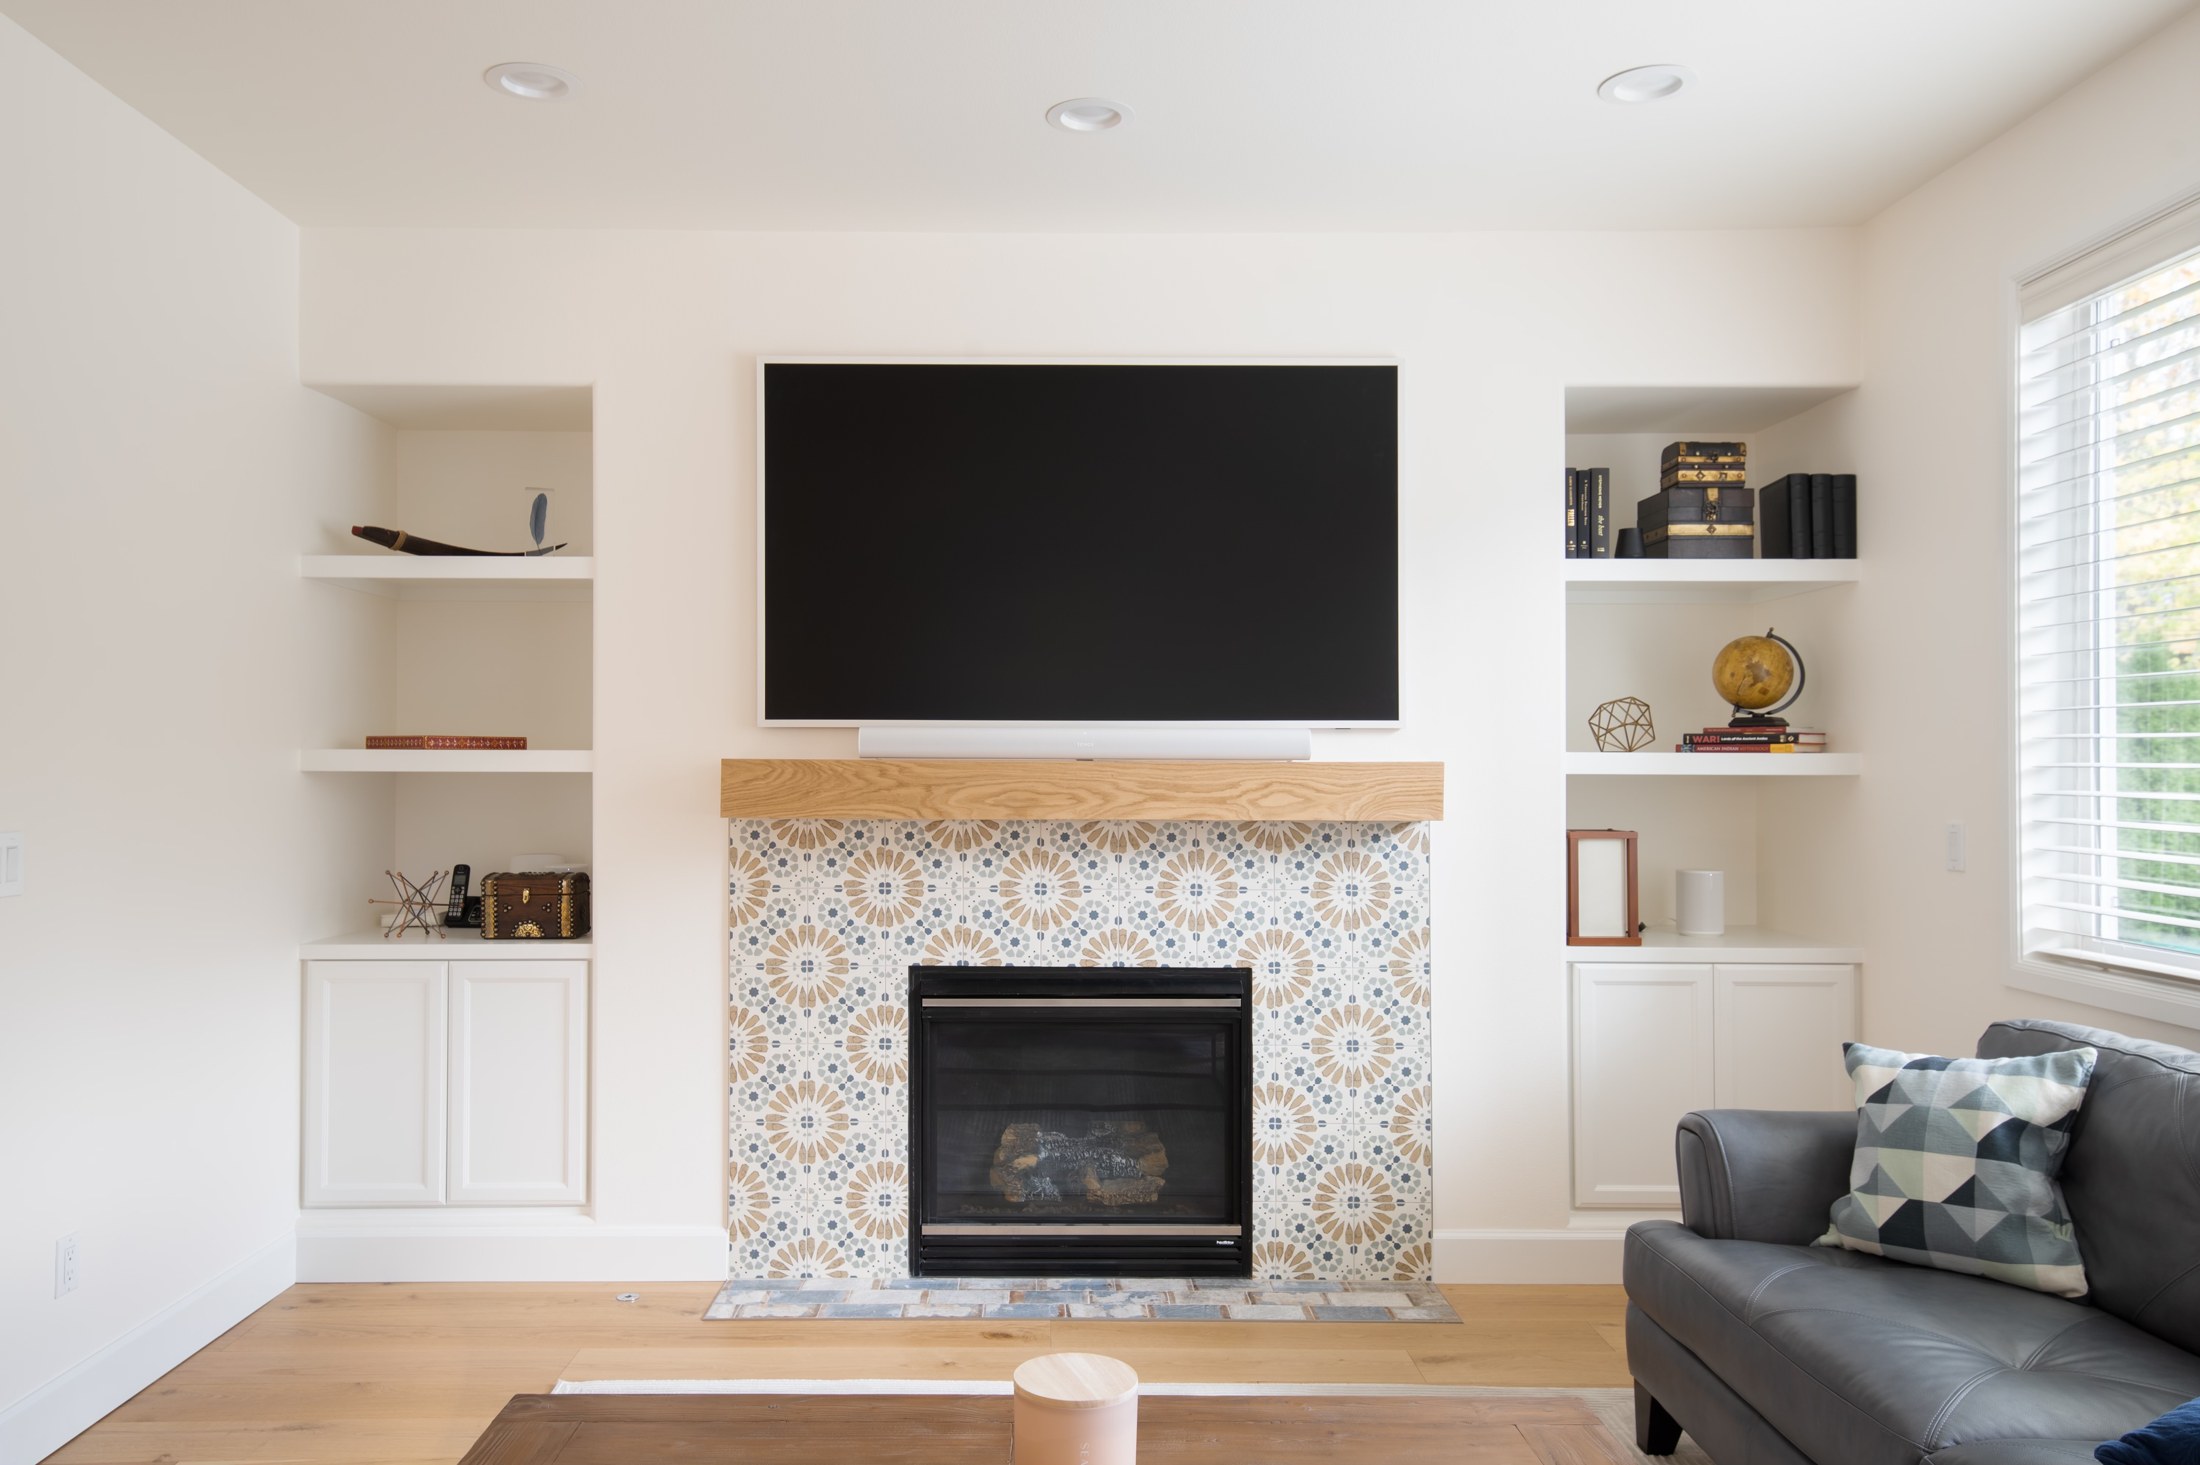
Patterned tile fireplace surround beneath a wood mantel between white built-in shelves

A focal point in patterned tile

Decorative tile frames the fireplace beneath a wood mantel in this separate living-room project.

15 materials to explore

Tile Materials & Installation Details

Material affects appearance, care and installation. Floor, wall, shower and exterior suitability must be checked for the specific product; a material name alone does not establish where it can be installed. Specialty materials and panel work require a project-specific review.

Porcelain Tile Installation

Porcelain tile offers a dense surface and a wide range of stone, concrete and wood designs. It is a versatile option for approved floor and wall applications. Our porcelain tile installation planning includes surface preparation, a compatible mortar and a layout that suits the tile dimensions. Common examples include 12 x 24, 24 x 24 and 24 x 48 inches.

Ceramic Tile Installation

Ceramic tile brings color and detail to kitchen backsplashes, bathroom walls and tub surrounds. Floor-rated ceramic products can also be used in appropriate flooring applications. We coordinate grout spacing, cuts and edge trim with the selected collection. Familiar sizes include 3 x 6, 4 x 4, 4 x 12 and 12 x 12 inches.

Glass Tile Installation

Glass tile reflects light and adds depth to backsplashes, shower accents and decorative walls. Glass installation requires the manufacturer-approved mortar and grout, with attention to the bond pattern visible through translucent pieces. Mosaic sheets and rectangular glass tiles need careful cutting and consistent joints for a balanced finish.

Natural stoneMarble, travertine, limestone, slate, granite and quartzite

Marble Tile Installation

Marble tile introduces natural veining to bathrooms, entries and feature walls. We plan the arrangement before setting to balance color and vein direction, then select materials suited to the stone. Marble needs stone-safe care; sealing, when appropriate, helps resist staining but does not prevent acid etching. Sizes commonly include mosaics, 12 x 12 and 12 x 24 inches.

Travertine Tile Installation

Travertine adds warm tones and natural texture to floors and walls. Filled, unfilled, honed and tumbled products create different looks and care needs. Installation planning considers surface openings, thickness variation and the chosen layout, including modular patterns. Common examples include 12 x 12, 16 x 16 and 18 x 18 inches.

Limestone Tile Installation

Limestone creates a soft, understated finish for selected floors, bathroom walls and fireplace surrounds. We review the stone finish, exposure and maintenance expectations before installation. Consistent support and careful handling help preserve its appearance. Limestone is acid-sensitive, so its care plan should use suitable non-acidic products.

Slate Tile Installation

Slate tile provides natural color variation and a textured appearance for suitable entries, floors and feature walls. Thickness and surface texture can vary between pieces, so the layout and setting method must accommodate the selected material. We review finish, cleaning needs and product suitability before recommending slate for wet areas.

Granite Tile Installation

Granite tile gives floors and walls a natural mineral pattern in polished, honed or textured finishes. We plan cuts and transitions around the actual tile thickness and intended use. A polished surface and a textured surface can perform differently underfoot, so floor selection considers moisture exposure as well as appearance.

Quartzite Tile Installation

Natural quartzite tile offers layered color and distinctive mineral movement for suitable floors and feature walls. Quartzite is different from engineered quartz. Installation planning reviews the actual stone, backing, thickness and approved application, with sample layouts used to balance variation across the finished surface.

Decorative & specialty materialsCement, terracotta, quarry, terrazzo, pebble and specialty tile

Cement Tile Installation

Decorative cement tile creates bold patterns in kitchens, entries and selected bathroom areas. These porous tiles need manufacturer-specific handling, installation and sealing. We plan the pattern repeat and edge cuts before setting, and confirm suitability for water exposure. Popular formats include 8 x 8-inch squares and hexagonal tiles.

Terracotta and Saltillo Tile Installation

Terracotta and Saltillo tile bring warm clay tones and a handcrafted appearance to a room. Natural variation in size, thickness and color influences the joint spacing and layout. Installation and finishing follow the selected product requirements, including sealing where specified. Common examples include 8 x 8, 12 x 12 and 16 x 16 inches.

Quarry Tile Installation

Quarry tile is an unglazed clay tile used in appropriate utility and commercial settings. We review the specified traffic, cleaning products, moisture exposure and required finish when planning the assembly. Mortar and grout selection depend on the use of the space. Common formats include 6 x 6 and 8 x 8 inches.

Terrazzo Tile Installation

Terrazzo tile combines visible aggregate with a cement or resin binder for a distinctive speckled finish. Installation requirements differ by product, so we confirm the binder type, moisture sensitivity and care instructions. Common examples include 12 x 12, 16 x 16 and 24 x 24 inches. This service concerns manufactured tiles rather than poured terrazzo.

Pebble and River Rock Tile Installation

Pebble mosaics bring an organic texture to accent areas and approved shower floors. Sheet placement, grout depth and drain detailing affect the finished appearance and drainage. The stone, mosaic backing and shower base must be compatible, and the finished surface should be reviewed for comfort, cleaning and wet-area use.

Specialty Decorative Tile Installation

Metal-faced, onyx, shell and mixed-material tiles can create distinctive accents. Each product needs individual review for moisture, heat, cleaning and setting-material compatibility. Specialty tile is evaluated for the specific project before its location or installation method is confirmed.

Find your design direction

Tile Styles, Shapes & Patterns

Subway, mosaic and hexagon describe formats; porcelain, ceramic, glass and stone describe materials. The selected product, pattern and room conditions determine the installation details.

01Subway Tile

Subway tile creates a familiar rectangular pattern for kitchen backsplashes, bathroom walls and tub surrounds. Choose a brick, horizontal stack or vertical stack layout, with grout color used to soften or emphasize the grid.

02Mosaic Tile

Mosaic tile uses small pieces arranged individually or on sheets. We align the pieces across sheet boundaries so the finished surface reads as one pattern. Shower-floor use depends on the tile, backing and shower-base requirements.

03Hexagon & Penny Tile

Hexagon and penny tile create geometric floor and wall patterns. Careful spacing around edges and fixtures keeps the design consistent. Small-format products may suit approved shower floors.

04Picket, Arabesque & Fish-Scale Tile

Picket, arabesque and fish-scale shapes create decorative backsplashes and accent walls. A planned starting point helps keep the pattern balanced around windows, cabinets and corners, where shaped tiles need additional cuts.

05Zellige & Handmade Tile

Handmade and zellige tile create variation in tone, glaze and surface. We blend pieces across the installation, with joint spacing, preparation and grout selected for the particular product.

06Wood-Look Tile

Wood-look porcelain or ceramic planks bring a wood-inspired appearance to approved tile applications. We plan plank direction, distribute printed designs and use a manufacturer-approved offset to account for the tile shape and natural bowing.

07Marble-, Stone- & Concrete-Look Tile

Porcelain and ceramic tile can reproduce marble veining, stone texture or concrete tones. We distribute repeating faces and coordinate grout color to create a balanced floor or wall.

08Herringbone & Chevron Patterns

Herringbone uses rectangular tiles arranged in a zigzag; chevron uses angled ends that meet in a continuous V. Accurate layout is essential, and both patterns can require additional cutting, material allowance and installation time.

09Basketweave, Checkerboard & Modular Patterns

Basketweave mosaics, alternating-color checkerboards and modular layouts create a more detailed surface. We check that tile dimensions and thicknesses work together, then plan pattern alignment and perimeter cuts before setting.

10Rectified & Large-Format Tile

Rectified edges support consistent sizing but still require grout joints. Large-format tile creates fewer joints, while requiring careful preparation and handling. The selected assembly determines the installation method.

Proportion, scale & layout

Tile Size Guide

All dimensions below are in inches and describe common nominal formats. Actual dimensions, thickness, sheet size and availability vary by manufacturer. These examples are a selection guide, not a live inventory or a guarantee that a format suits every room.

Small Tile & Wall Tile Sizes11 nominal formats · dimensions in inches

Small mosaics and wall tiles create detailed grids, linear patterns and decorative accents. The installation plan considers individual tile dimensions, sheet boundaries, corners and fixtures.

Small Tile & Wall Tile Sizes — nominal sizes in inches
Nominal size (inches)Design and installation considerations
1 x 1One-inch mosaic tile creates fine detail in shower accents, niches and decorative surfaces. Installation focuses on alignment between sheets and consistent grout joints. Shower-floor use requires approval for the complete assembly.
2 x 2Two-inch tile provides a compact grid for approved shower floors, bathroom accents and utility applications. Layout must follow the intended drainage planes and maintain neat cuts around the drain and perimeter.
3 x 3Three-inch squares offer a visible grid without the scale of larger tile. They work in selected wall and floor designs, with balanced perimeter cuts and a grout color that supports the intended pattern.
4 x 4 and 4.25 x 4.25Small square wall tile suits traditional bathrooms, backsplashes and handmade designs. Four-inch and four-and-a-quarter-inch products are different formats; actual dimensions must be confirmed when coordinating repairs or matching existing tile.
3 x 6Three-by-six subway tile creates a classic backsplash or bathroom wall. A planned starting line keeps courses consistent around cabinets, corners and fixtures, with brick or stacked layouts chosen to suit the room.
2 x 8 and 2.5 x 8Slim rectangular tile gives backsplashes and accent walls a more linear appearance. Horizontal, vertical and herringbone arrangements change the effect, with additional layout attention around outlets and exposed edges.
3 x 12Three-by-twelve tile stretches the subway format for a longer visual line. It suits selected kitchen and bathroom walls, with joint spacing and offset chosen for the actual tile and manufacturer recommendations.
4 x 12Four-by-twelve tile balances a familiar rectangular shape with a larger face. It can create orderly shower walls and backsplashes, with niche placement and trim coordinated to the chosen layout.
4 x 16Four-by-sixteen tile creates elongated horizontal or vertical lines. Accurate alignment helps carry the pattern through corners, while the installation plan accounts for tile variation and the approved layout.
6 x 12Six-by-twelve tile works in selected backsplashes, bathroom walls and floor patterns. Its proportions allow straightforward stacked layouts or more detailed arrangements, subject to the product rating and installation requirements.
6 x 18 and 8 x 16These rectangular formats provide a middle ground between small wall tile and larger panels. We plan orientation and cuts around the room proportions, maintaining a consistent pattern through adjacent surfaces.
Square Floor Tile Sizes10 nominal formats · dimensions in inches

Square tile can create a straight grid, diagonal layout or coordinated checkerboard. Floor use always depends on the chosen product and finish. Grout color changes how strongly the grid appears.

Square Floor Tile Sizes — nominal sizes in inches
Nominal size (inches)Design and installation considerations
6 x 6Six-inch square tile gives smaller spaces a defined grid and is available in several ceramic and quarry collections. Installation planning considers frequent joints, perimeter cuts and the intended traffic and cleaning routine.
8 x 8Eight-inch tile suits decorative cement patterns, selected ceramic floors and vintage-inspired rooms. Patterned designs need careful positioning so repeat motifs remain balanced at doorways, walls and the main viewing area.
12 x 12Twelve-inch square tile is a versatile format for entries, kitchens, laundry rooms and bathrooms. We coordinate the grid with doorways and adjoining floors, selecting products rated for the intended location.
16 x 16Sixteen-inch tile gives floors a larger module while keeping a regular square layout. The installation requires attention to surface flatness and cuts so the pattern stays balanced in narrow areas and around cabinets.
18 x 18Eighteen-inch tile creates a broader floor pattern with fewer joints than smaller squares. It works well where the room proportions support the scale, with preparation and setting methods matched to the tile.
24 x 24Twenty-four-inch square tile creates an open, orderly appearance in larger floors and selected wall designs. The layout must account for entrances, perimeter cuts and transitions, with extra attention to the supporting surface.
30 x 30Thirty-inch tile emphasizes a broad, modern grid. We review the room dimensions and actual tile module before recommending the layout, including how large pieces will be brought into the installation area.
32 x 32Thirty-two-inch tile is available in selected large format collections. Installation planning includes access, handling and how the actual dimensions relate to the room; nominal metric equivalents may differ slightly.
36 x 36Thirty-six-inch square tile creates expansive surfaces with relatively few joints. Larger pieces require coordinated handling and a carefully prepared base, with placement planned around visible edges and transitions.
48 x 48Forty-eight-inch tile makes a strong architectural statement on approved floors and walls. Access, tile weight, cutting space and substrate condition are reviewed before the installation scope and layout are confirmed.
Large Rectangles, Planks & Panels10 nominal formats · dimensions in inches

Larger tile does not automatically mean a simpler installation. Access, preparation, cutting, support and handling become more significant as dimensions increase. Porcelain panels require a separately confirmed specialist scope.

Large Rectangles, Planks & Panels — nominal sizes in inches
Nominal size (inches)Design and installation considerations
12 x 24Twelve-by-twenty-four tile is a versatile option for bathroom floors, shower walls and kitchen floors. Horizontal, vertical or approved offset layouts can change the room appearance while coordinating with niches and fixtures.
16 x 32 and 18 x 36These elongated formats create a larger visual field on approved floors and walls. Layout planning balances tile direction, vein movement and the size of cuts at visible room edges.
24 x 48Twenty-four-by-forty-eight porcelain tile creates fewer grout joints on suitable shower walls, floors and feature walls. Installation includes careful access planning, surface preparation and cutting around plumbing, corners and architectural details.
30 x 60 and 32 x 64Oversized rectangular tile creates broad, continuous-looking surfaces. Each project needs a review of tile thickness, weight, handling and the installation system, with seam locations planned around the design.
6 x 24 and 6 x 36Narrow wood look planks suit spaces where a finer board pattern is desired. We arrange printed faces and use an approved offset, with direction selected to complement the room and adjoining flooring.
6 x 48 and 8 x 48Longer wood look planks create extended grain lines. The installation plan addresses substrate flatness, tile bowing and the permitted layout so adjacent pieces are supported and aligned appropriately.
9 x 48 and 8 x 60Wider or longer porcelain planks create a broad-board appearance. Product-specific handling and layout become especially important, along with distributing repeated patterns across the finished floor.
48 x 96Large porcelain panels can create nearly full-height wall surfaces with fewer seams. Panel projects require a dedicated review of access, lifting equipment, trained installation labor and manufacturer-specific setting methods.
60 x 120 and largerVery large porcelain panels or slabs can produce dramatic feature walls and selected shower designs. Availability, actual dimensions, substrate suitability and the specialist installation scope must be confirmed for each project.
Mosaic sheetsA sheet labeled 12 x 12 may contain small squares, hexagons, rounds or mixed pieces. The sheet size is different from the individual tile size; both affect the layout, quantities and installation method.
Discuss your tile selection →

From the supporting surface to the final finish

Our Tile Installation Process

A lasting tile installation depends on the layers beneath the finish as well as the tile itself. The following sequence is adapted to the agreed scope, chosen materials and existing conditions; not every project includes demolition, a shower or floor heating.

  1. Consultation & Project Measurements

    We discuss the room, design goals, budget and intended use, then measure the installation area. We identify visible conditions that may affect preparation, transitions or scheduling. The estimate defines the agreed tile work and related services, with concealed conditions reviewed if they become accessible during demolition.

  2. Tile Selection & Layout Planning

    At our Kirkland Design Center, we help coordinate tile material, size, finish, grout color and edge trim. We review floor or wall approval, wet-area suitability and care needs. Layout planning includes focal points, tile direction, pattern repeats, niches and visible cuts. Material quantities account for the design and a project-specific cutting allowance.

  3. Site Protection & Removal

    We protect adjacent surfaces and plan access to the work area. Existing tile or other finishes are removed where included in the scope. Once the base is exposed, we inspect for loose material, damage or conditions that could affect bonding, and discuss needed repairs before covering the area.

  4. Subfloor & Wall Preparation

    The supporting surface is checked for stability, cleanliness, flatness and compatibility with the installation system. Preparation may include repairs, approved patching, flattening or suitable underlayment. Floors needing drainage must keep their designed slope. A self-leveling product is used only where appropriate; tile-setting mortar is not a substitute for correcting major surface irregularities.

  5. Underlayment, Waterproofing & Drainage

    We select an approved assembly for the application. Depending on the project, this may include backer board, an uncoupling membrane, crack-isolation treatment or a waterproofing system. Shower work includes coordinated details at seams, penetrations, niches, benches, curbs and the drain. Tile and grout alone do not make a shower waterproof.

  6. Shower Testing & Heated-Floor Preparation

    Where a shower receptor is included, the waterproofing is allowed to cure and is water-tested before tile installation in accordance with the selected system and applicable requirements. For an included heated floor, cable layout and electrical coordination are planned in advance, and manufacturer-required testing is documented before, during and after installation.

  7. Layout Confirmation & Tile Setting

    We establish reference lines and confirm the pattern before setting. Mortar is selected for the tile, substrate and application. Troweling and back-troweling are adjusted as needed, and tiles are periodically lifted to check the required mortar contact. Cuts, joints and edge alignment are checked as work progresses.

  8. Movement Joints & Edge Details

    Perimeters, changes of plane and other designated locations need movement accommodation appropriate to the assembly. We preserve specified joints and use suitable flexible sealant or movement profiles where required. Exposed edges are finished with the agreed trim, tile edge or other detail, and transitions are coordinated with adjacent flooring.

  9. Grouting, Sealing & Curing

    After the setting material has cured sufficiently, we apply a grout compatible with the tile and use conditions. Stone and grout are sealed only where recommended. Sealer can reduce staining but does not replace waterproofing. We follow the relevant cure times before foot traffic, cleaning, heat activation or shower use.

  10. Final Inspection & Care Guidance

    We review the finished installation, clean the work area and explain the required waiting periods before use. Care guidance covers suitable cleaners, maintenance of flexible joints and resealing where applicable. Natural variation, agreed design details and any project-specific maintenance needs are reviewed during the final walkthrough.

Details That Affect the Finished Result

Large tile. Flatness, tile shape and layout influence the difference in height between adjacent edges, called lippage. Leveling clips may assist installation, but the supporting surface still needs proper preparation.

Small mosaics. Sheet alignment and grout-joint consistency become especially visible. Mosaic size must also be compatible with the selected underlayment or shower base.

Natural stone. Color, mineral markings and thickness can vary. The layout, setting products and maintenance plan must suit the specific stone.

Wet areas. The complete assembly matters, including the backing, waterproofing, drain connection and penetrations. A water-resistant tile surface does not establish a waterproof installation.

Request a Tile Installation Estimate

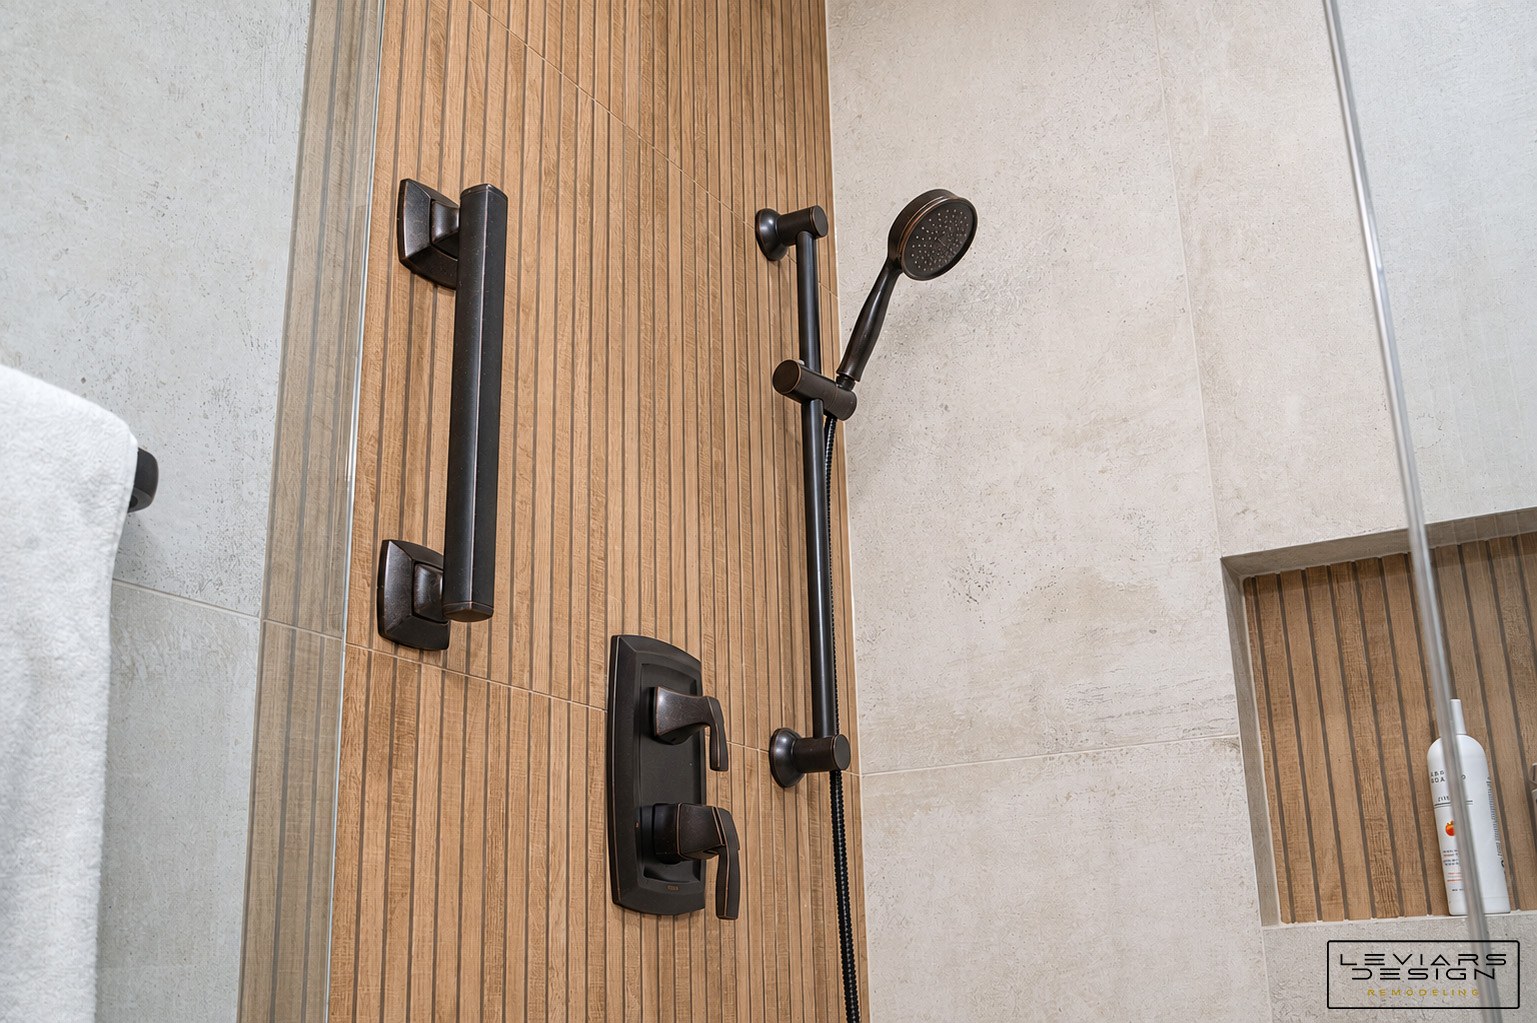
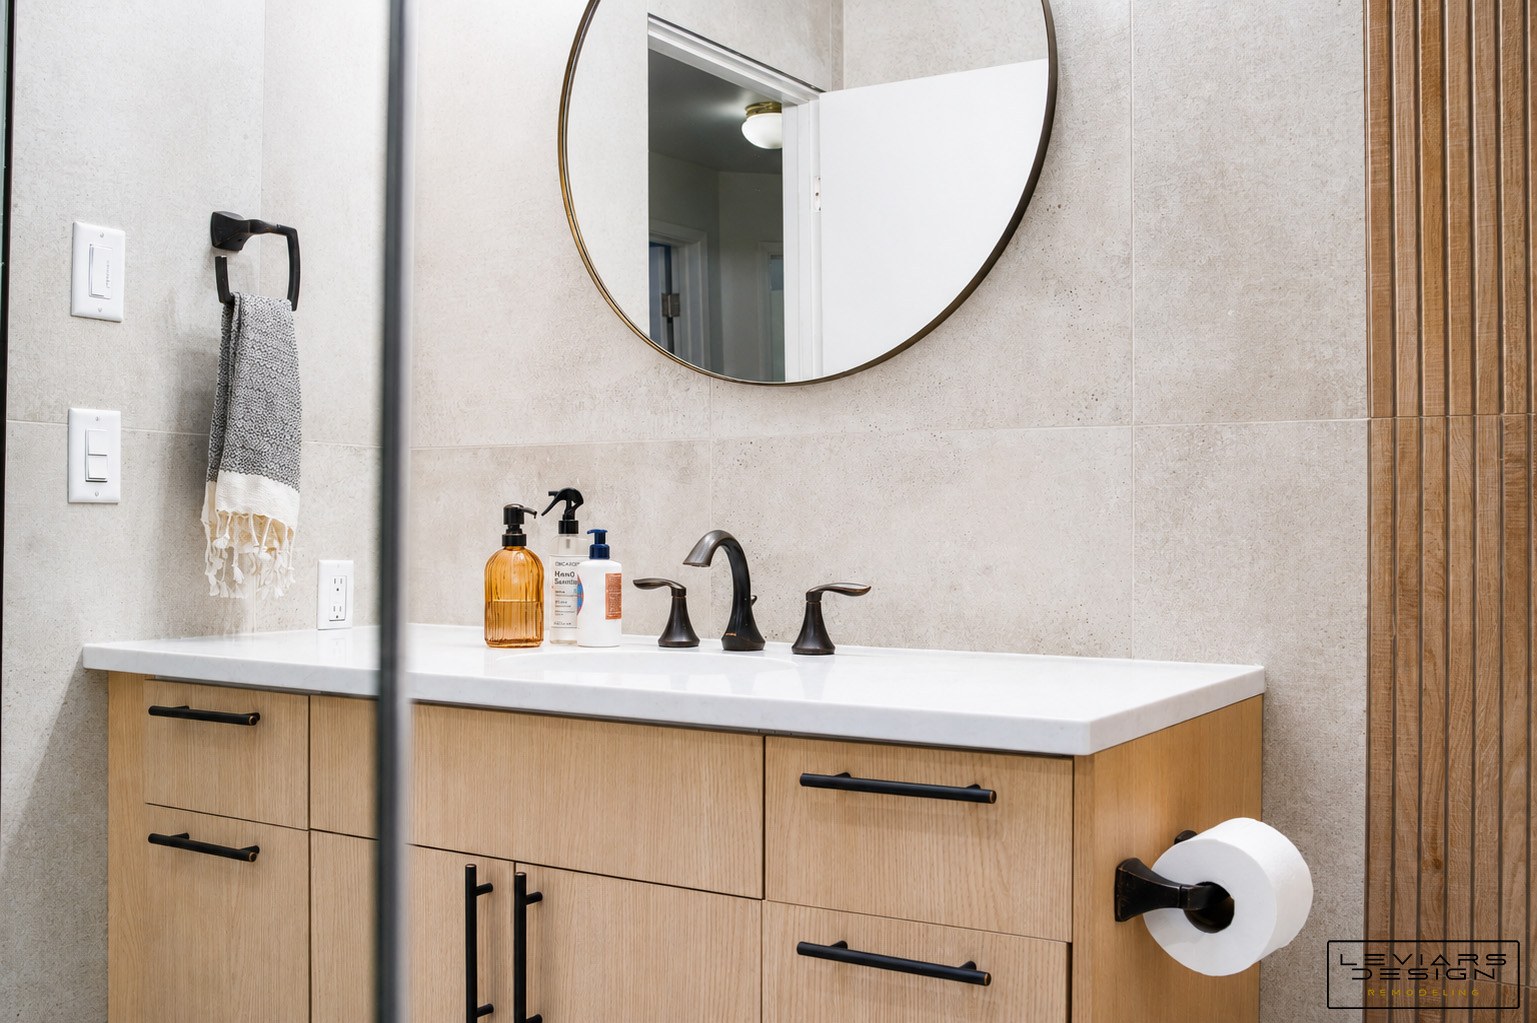
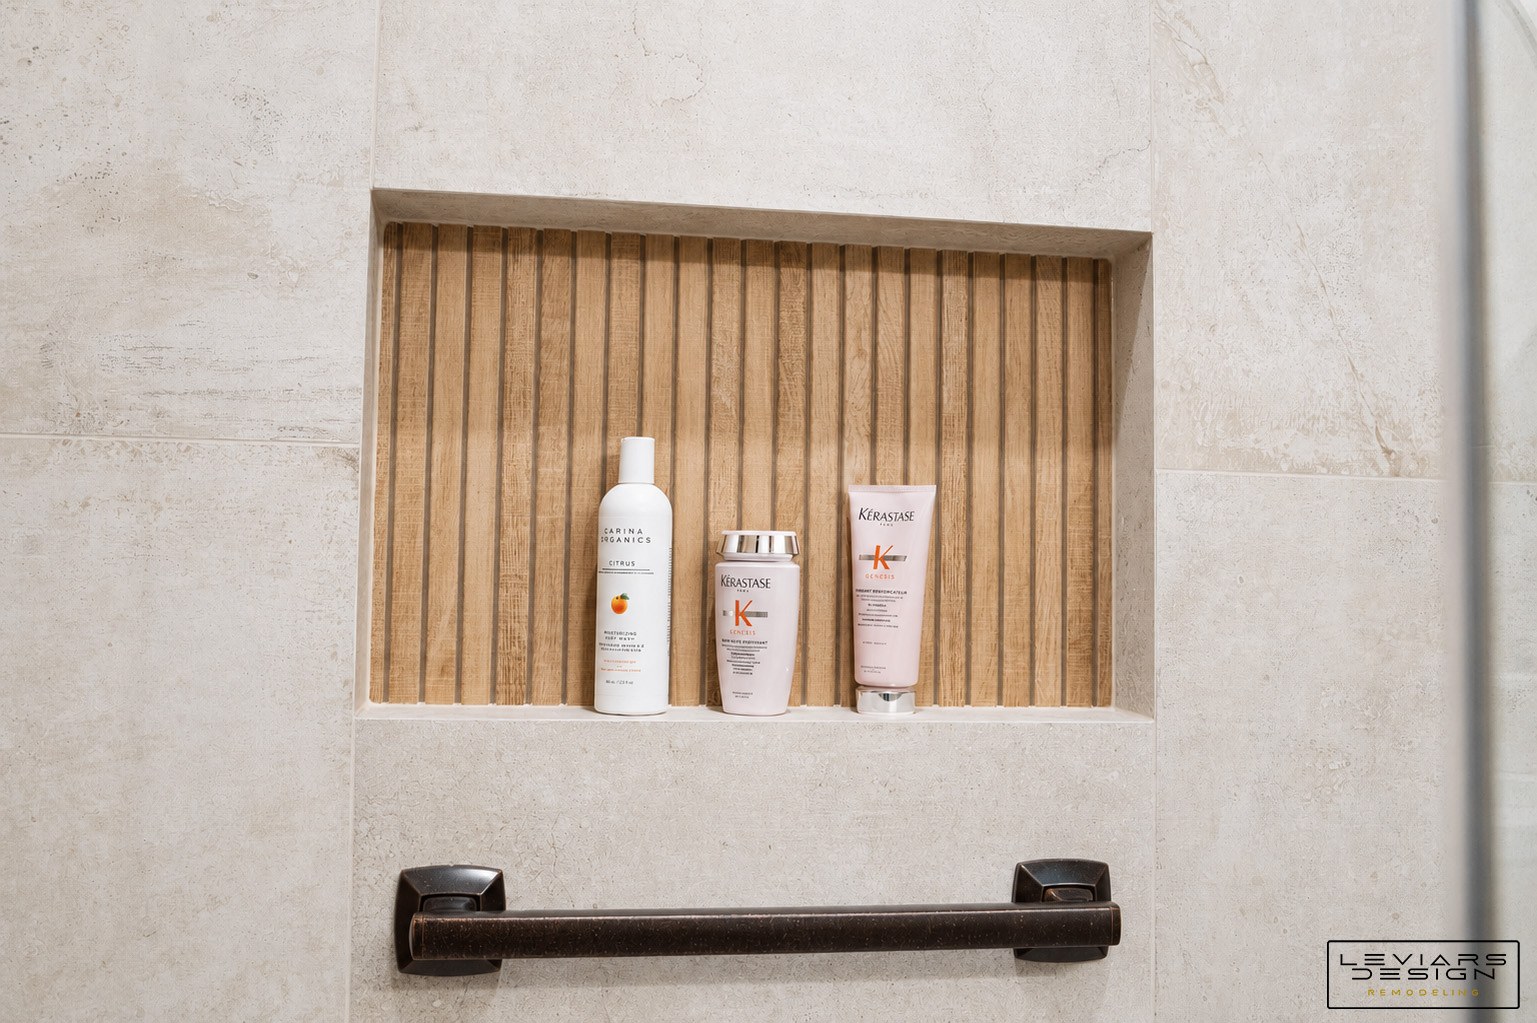
One completed bathroom, seen in detail

A consistent palette, right down to the niche.

Another bathroom in our project collection combines pale wall tile with a warm vertical texture and dark fixtures. These photographs show how that palette continues across the shower, beside the vanity and inside the niche.

For your project, tile dimensions, layout, trim and wet-area preparation are confirmed for the actual space and selected products.

Explore bathroom remodeling →

Plan the full scope

Understand Your Tile Installation Estimate

A tile estimate depends on more than the area being covered. The material, format, pattern, existing surfaces and finishing details shape the work. Review the proposed scope and exclusions before approving installation.

Areas, materials & layout
The surfaces being tiled, selected product, actual dimensions, pattern, trim and project-specific cutting allowance.
Removal & surface preparation
Protection, removal, disposal, repairs, flattening and underlayment where included.
Wet-area assembly & installation
Waterproofing and drainage where applicable, setting materials, tile installation, grout, movement joints and edge details.
Related work & exclusions
Whether tile supply, delivery, plumbing, electrical work, shower glass, adjacent painting and other services are included or separate.
Changes & concealed conditions
How newly exposed conditions, additional work, price changes and schedule effects will be reviewed before proceeding.

Plan Installation and Return-to-Use Time Separately

A backsplash, tile floor and full shower involve different stages. Planning, ordering, removal, preparation, waterproofing and inspections where required come before the final finish. Setting materials, grout and sealants also need their specified cure periods. We establish the expected sequence for the agreed scope and explain when the area can be used, cleaned or heated again.

Already Selected or Purchased Your Tile?

Contact our team before scheduling customer-supplied tile. Share the manufacturer, product name, actual size, quantity and any installation information. Product acceptance, supply responsibilities and any additional material needs must be confirmed for the project; this guide does not mean every supplied product can be installed.

Permits, Related Trades & Written Coverage

Before approving the work, confirm which related services and approvals are included, who handles applications and inspections when required, and how fees are addressed. Review the applicable written workmanship terms separately from product warranties. The material guide is not a promise of a particular warranty term or a substitute for the project agreement.

Useful answers before you begin

Tile Installation Questions

Which tile works best for bathroom floors?

The right tile is a floor-rated product suited to the bathroom conditions and your care preferences. Porcelain is often considered, but the finish, wet-area use classification and specific manufacturer guidance matter. Shower floors also require compatibility with the drain layout, slope and shower base.

Can large tile work in a small bathroom?

Yes, a small bathroom can use large tile when the supporting surface and layout are suitable. Larger pieces can reduce the visible grout grid, but fixture locations and perimeter cuts may limit the design. We compare the actual tile dimensions with the room before recommending a size.

Can large tile be installed on a shower floor?

Sometimes. Large tile requires a layout that follows the drainage planes, potentially including envelope cuts or a suitable linear-drain arrangement. Smaller mosaics can follow changes in slope more easily, but all options must meet the shower-system and tile requirements.

Can new tile be installed over existing tile?

Some assemblies allow tile over tile after the existing installation is checked for soundness and compatibility. Added height, transitions and bonding requirements must also be reviewed. Loose tile, unknown water damage or an unsuitable base may require removal before a new installation.

Does every tile need sealing?

No. Sealing depends on the tile, stone, finish and grout selected. Many glazed tiles do not need surface sealing, while some porous materials benefit from an appropriate sealer. We follow product guidance and explain any maintenance requirements for the finished installation.

Can tile be installed over heated floors?

Many tile installations can be designed with compatible electric floor-heating systems. The heating system, substrate, tile and setting materials must work together. Electrical coordination, testing and the waiting period before activating the heat are part of the installation plan.

How much does tile installation cost?

Cost depends on area, tile material and size, pattern, removal, surface preparation, waterproofing and finishing details. Large panels, intricate mosaics and specialty cuts can require additional labor or equipment. LeviArs prepares a project-specific estimate after reviewing the space and selected materials.

How long does tile installation take?

The schedule depends on project size, demolition, repairs, waterproofing, inspection needs, tile complexity and product curing times. A backsplash and a full shower involve different steps. We establish the expected sequence after confirming the scope and site conditions.

Where can I find tile installation near me?

LeviArs Design & Remodeling provides tile installation from our Kirkland Design Center for projects across King County and Snohomish County. Contact us with your location, room measurements and tile ideas to discuss your project and arrange an estimate.

Can I hire LeviArs for a tile-only project?

Yes. Tile installation is available as a standalone project or as part of a kitchen, bathroom or whole-home renovation. Tell us the area you want to tile so we can discuss the appropriate scope.

Can I provide my own tile?

Ask us to review the selected product before scheduling. Share the collection, dimensions, quantity and intended location. Customer-supplied material acceptance, installation requirements and responsibilities need to be confirmed for the particular project.

When can I walk on the tile floor or use the shower?

Installation completion and return-to-use time are not always the same. The selected mortar, waterproofing, grout and sealant determine the required waiting periods. We explain the applicable restrictions before foot traffic, cleaning, heat activation or shower use.

Are all listed materials and sizes available at the Design Center?

No. The materials and nominal sizes in this guide describe options to discuss, not live inventory or guaranteed display samples. Ask our team to confirm the selected collection, actual dimensions, availability and project suitability before ordering or planning a visit around a specific product.

From our Kirkland Design Center

Tile Installation Across King and Snohomish Counties

LeviArs Design & Remodeling serves Kirkland, Bellevue, Seattle, Redmond, Sammamish, Issaquah, Mercer Island, Renton, Bothell, Kenmore, Shoreline, Edmonds, Lynnwood, Mountlake Terrace, Lake Forest Park, Woodinville, Duvall, Monroe, Mill Creek, Everett, Mukilteo, Marysville, Snohomish, Arlington, Granite Falls, Sultan and Gold Bar.

View our service areas →

Request a Tile Installation Estimate

Plan Your Tile Installation

Tell us which area you would like tiled and the best way to reach you. Photos, inspiration, approximate measurements and information about tile you have selected are helpful but optional for the first inquiry.

Our team will contact you to discuss the space, materials and appropriate next step. Meeting arrangements and any applicable consultation or site-visit fee should be confirmed before scheduling.

In the optional Project Details field, tell us whether you are planning a shower, tub surround, backsplash, tile floor, fireplace, feature wall or commercial interior. You can include the material, actual tile size and whether you have already purchased it.

For a question before choosing an appointment date, call (425) 248-7799 or contact the studio.

Your request is sent securely through this form. Preferred dates and times are not confirmed until a LeviArs team member contacts you. Read our Privacy Policy.

Open form in a new tab ↗